Showing posts with label funfold. Show all posts

Sunday, August 2, 2026

Paper Rose Campfire Tales | Diamond Fun Fold | Two Ways

Hi All, 

Today's card is using products from Paper Rose Studio


Card Size 10.7cm x 15.3cm (4 1/4" x 6")
 
Card Base 21cm x 15.3cm (8 1/4" x 6")
You will need 1 piece of patterned paper at
11cm x 7cm (4 5/16 x 2 3/4") 
Next you will need 2 squares of coordinating paper measuring
7cm x 7cm ( 2 3/4 x 2 3/4") 
 
Using a score board with the  long edge along the top score at 3" (makes it easily to use inches with fun folds)
Rotate the cardstock to have the 6" edge along the top and score it again at 3".
 
This leaves you with 2 squares areas and 2 rectangles. Make sure the squares are on the left. Grab a pencil and make a mark at the 5 1/8" along the top edge. I just made a little dot and used a ruler to make the same mark on the bottom edge. I place the straight edge of the ruler flat against the top at the 5 1/8 and use the bottom of the ruler to do the same on the bottom.
 
Next we are going to make a mark on the center fold. I use the ruler again and place the edge flat against the top but this time at the 3 3/4 mark and make a dot on the centre line.
 
Remove the cardstock from the score board and use your ruler to score from the edge into the centre on both edges making a ^ shape. Check out the video if you need more support.
 
Fold the (2) 3" score lines into mountains which means you fold it away from you and fold is coming up.
 
Gently use a bone folder on the ^ to make a valley fold, meaning the cardstock edges are coming towards you. Fold going down. Fold the card up using these folds, once you ease the valley folds into place it should be fairly easy.
 
Decorate as you please. 
 
Product List Below 
 
Stardust Stickles
Cream 12 x 12 cardstock
 
Copics Used
W5, W3 and W1 


Things that I showed in the video but didn't use is the Patterns Collection, Campfire Tales 6x6 and the Quick Cards Kit. There is a few other things in this collection but I haven't listed them here.
The links are affiliate links, which if you are not familiar, I get a small commission if you use my links and this is no cost to you.
 
I really prefer the landscape version of this card, probably because it is the shape I made about 15 years ago (I feel old. lol)
 
You can watch the video here. 


That is all from me today. Thank you for your time. 
Take Care Natalie

Thursday, July 2, 2026

Paper Rose Studio Portraits In Bloom Pop Up Card | Fun fold

Hi All, 

Today's card is using products from Paper Rose Studios


Card Size 15cm x 15cm ( 6" x 6")
Feature Panel Size 14.4cm x 14.4 cm (5 11/16" x 5 11/16") need 3 (2 for the inside).
Matt 14.8cm x 14.8cm (5 7/8" x 5 7/8") need 3 (2 for the inside).
 
Inside the card you will need
White cardstock 25.4cm x 10.1 (10" x 4") 
 
We will be working in inches for scoring it just makes it easier.
Along the 10" side score at 2 1/2", 5" and 7.5"
 
Designer Paper
9.7cm x 6cm (need 4 of these) or 3 13/16" x 2 5/16"
 
Vellum 
5.9cm x 8.3cm (2 5/16" x 3 1/4")
 
White Card Stock
3.9cm x 7.6cm (1 1/2" x 3") 
 
Product List Below 
 
Stardust Stickles 
 
Score the white cardstock (that is 10" x 4") as valley, mountain and valley folds. (Valleys go down and mountains go up or you can check out the video for help. 
 
Before you apply the white cardstock decorate the inside of the card base. 
 
To apply fold up the cardstock and apply glue to one side and position it where you want. I found it easier to first hold it in place to see where you would like to place it. It doesn't have to be perfect.
 
Decorate with the designer pattern to your choosing. On one panel I cut a small rectangle of white cardstock with a matt of vellum. This is the panel I plan to write on. 


You can watch the video here. 
 
That is all from me today. Thank you for your time. 
Take Care Natalie

Tuesday, June 2, 2026

Paper Rose Petals & Pansies Collection | Triple Layered Bridge Card | Fun Fold

Hi All, 

Today's card is using products from Paper Rose Studio 


Card Size Aus A6 which is 10.5 x 14.9cm (4 1/8 x 5 7/8) 
 
Another super simple card and I am using the beautiful Petals & Pansies Collection
 
On the front of a top folding Australian Card base ( half of an A4 sheet) make a mark on the front panel at 2.5cm and again at 8cm or 1" and 3 1/8". You need to mark this on the fold line and the bottom edge. Use a ruler and cut from the fold line to the bottom on the front panel only. 
 
For the front papers, do what I say as I stuffed up a little in the video and I was lucky that the whole pattern still mostly looks the same and matches.
 
You need a sheet of your desired paper and cut it at 9.3 x 14.4 
 
On the 9.3cm side, using a pencil and mark at 2.1cm and 7.2cm. Using a guillotine cut this apart. This will give you a beautiful continued design.
 
The trick with this card is to use die cuts that can be put together or are wide enough to extend from the 2 panels on the far left and right side of the card. My chair does but I still added the little flowers so my chair would be off set slightly.
 
Decorate as you wish.  


Product List Below 
 
Stardust Stickles


You can watch the video here. 


That is all from me today. Thank you for your time. 
Take Care Natalie

Sunday, May 3, 2026

Paper Rose Boho Baby Collection | Doubledecker Fun Fold

Hi All, 

Today's card is using products from Paper Rose Studio


Card Size Aus A6 which is 10.5 x 14.9cm (4 1/8 x 5 7/8") 

I really enjoy fun fold card and this one is quite simple. You can use a straight forward A6 (Aus) card base, folded in half and then the front is folded in half again. I will give you all the measurements for the card. 

Card Base 14.8 x 21 scored on the 21cm side at 5.2 and 10.5. Easier to just half the base in half and one panel in half again.

Designer pattern (DP)
Inside Panel 10 x 14.4cm (4 x 5 11/16")
2 strips 4.7 x 14.4cm (1 7/8 x 5 11/16")
 
Front 
DP 7.2 x 10.2cm (3 x 4") 
White Cardstock CS 7 x 9.6cm (2 3/4 x 3 3/4")
 
Inside Popped Up Panel
Green CS 7.4 x 11.2cm (2 7/8 x 4 3/8")
DP 7 x 10.9cm (2 3/4 x 4 1/4")
White CS 5.5 x 8cm (2 3/16 x 3 1/8")
 
Pop UP mechanism 
5.8 x 7.7cm (2 1/4 x 3")
Along the 7.7 cm side score at 2cm, 3.8 and 5.7, but I find it easier to do scoring on a score board which most are in inches so, score at 3/4, 1 1/2 and 2 1/4"
 
This needs to be folded to form a cube. Fold this flat with the 2 cut edges touching each other (if you turn it over you will have a single folded line). Apply glue on the panels either side of the cut edges.
Turn it over and place it either side of the score line between the middle panel and back panel. The Score line should line up with the score line on the card base. Now if you slightly close the card this will make a platform.
 
The inside popped up panel with be glued on the top of the platform, making it pop up! :)
 
Fold the card up and apply glue to the very left side of the remaining panel. With the card closed you can position the panel centered using the inside panel. You can, of course, swap these panels and the smaller one will be hidden behind the larger one in front. 
 
Decorate as you wish with the coordinating diecuts.
 
Product List Below 
Multiliner Pen 0.3  


You can watch the video here. 
 
 
That is all from me today. Thank you for your time. 
Take Care Natalie

Wednesday, April 22, 2026

Polkadoodles Craft Whats The Buzz - Bee Buzzy Gnome Digi Stamp | Fun Fold | Prismacolour Pencils

Hi All, 

Today's card is using products from Polkadoodles Craft called What's the Buzz- Bee Buzzy Gnome.

This fortnights' theme is Birthday Card with a Different Fold.


Card Size Aus A6 which is 10.5 x 14.9cm (4 1/8 x 5 7/8) 
Feature Panel Size 6.2 x 9.3cm (2 7/16 x 3 5/8) 
Small Matt 6.8 x 9.8cm ( 2 5/8 x 3 7/8) 
Larger Matt 9.7 x 14.1cm (3 13/16 x 5 9/16) You need 2 of these.
 
This card is super simple. Using a standard card base, cut diagonally from the top left down to the bottom right. You will also do this with one of the larger matt pieces. This will give you an edge once you apply the triangled piece to the flap of the card front. 
 
Take another card base that is folded and you will cut this at 7.3cm or 8 1/4" ( please remember this is based on A4 piece of card. American card bases are different from AUS and I think the UK. Not sure about Europe. AFTER you have applied the second large matt that is not cut into a Triangle (one is a triangle and the other standard Rectangle) you can glue the smaller card onto the "inside" of your base card. Just make sure that it move nicely as you open it. Then decorate it.


Product List Below  
 
 
Prismacolor Pencils
Skin - Dark Umber 947, Beige Sienna 1080, Peach 939, Eggshell 140 and Cream 914
Hair - Chocolate 1082, Light Umber 941 and Golden Rod 1034
Blue - Idanthrone Blue 208, True Blue 903 and Periwinkle 1025
Green - Dark Green 908, Olive Green 911 and Apple Green 912
Blue Green - Cobalt Turquoise 105, Aquamarine 905, Light Aquamarine 992 and Light Green 920
Orange - Chestnut 1081, Pumpkin Orange 1032 and Yellowed Orange 1002
Purple - Black Grape 996, Imperial Violet 1007, Parma Violet 1008 and Greyed Lavender 1026
Black - Black 935, Cool Grey 90% 1067 and Cool Grey 70% 1065
Yellow - Chocolate 1082, Golden Rod 1034 and Canary Yellow 916
 
Clear Confetti
Stardust Stickles 


That is all from me today. Thank you for your time. 
Take Care Natalie

Friday, January 2, 2026

Paper Rose Perfect Pair Paper Collection | Centre Pop Up Card

Hi All, 

Today's card is using products from Paper Rose. 

I received a card from a friend, Judy, so with her blessing I have recreated it. She knows I am and tickled pink I am remaking her card. She doesn't do blogging or Youtube but she does follow. 

Here is her card to me.


 This is mine.


Card Size Aus A6 which is 10.5 x 14.9cm (4 1/8 x 5 7/8) 
 
The card base is the same as an Aussie card base. So my American friends will have to alter the measurements for the background paper. The rest should be fine. 
 
Card base
Fold it in half and then you will fold each half again so you will have 4 equal panels.
 
The centre band is 2.5cm x 16 cm (1" x 6 1/4") I scored the piece 4 times but I think it might be better to score the middle 2 score lines and just fold the 2 side panels when you make the card but I will give you all my measurements. Scored at 1", 2 1/4, 3 5/8 and 5 1/4.
 
The pop up piece I used a 3 1/2" scallop die and 3 3/16 Stitched circle die. Stitched piece is cut out of a piece of the paper from the pad. Scallop circle is cut from Paper Rose Purple Pansies, which is also used for the matt on the background.
  
Measurements for Design paper 
4.2cm x 13.7cm (1 5/8 x 5 3/8) you need 4 of these. I have used 2 different papers.
Matt
4.8cm x 14.2cm (1 7/8 x 5 1/2) again you will need 4 of these
 
You can glue each paper to the matt but before you add the 2 ones you want for the far left and right you will need to add the centre pop up piece. After you glue the 2 middle back panels lay the card flat on your table and add a little bit of glue to the far edges of the centre piece and roughly place it in the centre (top to bottom) and have the 2 middle score lines on either of the very centre score line on the card base. Check out the video below for more help.
 
When you wish to add the scallop circle, place the card base open and flat on your table and you simply apply a little bit of glue in between the 2 middle  score lines and adhere the scalloped circle.
  

Product List Below 
 
Stacked Sentiments 2 34386 - this one is currently out of stock and should be back soon.
Spellbinders Scallop Circle Small. Mine is very old but I have another here


You can watch the video here. 


That is all from me today. Thank you for your time. 
 Take Care Natalie

Sunday, November 2, 2025

PaperRose Golden Days Paper Collection | Accordian Gate Fun Fold

Hi All, 

Today's card is using products from Paper Rose


Card Size Aus A6 which is 10.5 x 14.9cm (4 1/8 x 5 7/8).
 
Base
5.5" x 9.5" Scored at 1/2, 2 5/8, 6 7/8 and 9" Fold these starting at 1/2" a mountain, valley, valley and mountain fold. If you are not sure what I mean watch the video below. It is easier to show than explain.
 
Cream Matt
3 15/16" x 5 1/4" or 10 x 13.3cm (1only of this)
1 7/8" x 5 1/4" or 4.8 x 13.3cm (4 of these)
 
Designer Paper
3 13/16 x 5" or 9.7 x 12.7cm (1)
1 3/4 x 5" or 4.4 x 12.4cm (4)
 
Accordian
3 x 10 5/8" Scored at 2 1/8, 4 1/4, 6 4/8 and 8.5" Fold these starting at the 2 1/8 Mountain, valley, valley and mountain fold.
 
Cream Matt
1 7/8 x 2 3/4" or 4.8 x 7cm (5)
 
Designer Paper 
1 3/4 x 2 9/16" or 4.4 x 6.5cm (4) 
 
Once you cut the bases and scored them, you will need to place the accordian panel over the card base. It doesn't need to be exact, just roughly eyeball to the middle panels are both centered. We are NOT gluing anything down yet!
 
Using this as a guide draw a line on the 1/2" tabs. You need to cut these cut from the top down to a little below the line, this will help when we add everything together. Rotate the base and do the same to the bottom tabs.
 
It is easier to decorate before you add the accordian panel. 
 

Product List Below 
 

Stardust Stickles
Clear Sequins 


You can watch the video here. 


That is all from me today. Thank you for your time. 
Take Care Natalie

Thursday, October 2, 2025

Paper Rose Christmas Holly Paper Collection | Fun fold Cradle Card | Embossed Die Cuts

Hi All, 

Today's card is using products from Paper Rose

I am calling this card a Cradle Card but I have also seen people call it a Book Cradle Card. I like to keep it simple thou. I haven't found the right way to photo these fun fold cards so bare with me.

NOTE! You REALLY need heavier weight cardstock. 


 What will you need 

Cradle - 3 x 6 (3) With the 3" side at the top of you scoring board score at 1 1/2"
Top - 4 x 6 (2) With 4" side at the top of you scoring board score at 1/2 and 3 1/2"
Stopper - 2 1/2 x 6 (1) With 2 1/2 at top of scoring board score at 1/2, 1,1/4 and 2
 
Designer Paper
 
Cradle - 1 1/4 x 5 3/4 (4)
Front and Back - 2 3/4 x 5 3/4 (2)
Very Top strip - 1/4 x 5 3/4  
 
Starting with stopper you need to fold it to form a W, so the first score forms a V (valley) next goes up to make a mountain (upside down V), so fold is in the air and the next is a V again, so fold is on the table.
 
Put that aside for the time being. Fold all the 3 x 6 pieces on the score line. Okay, taking one piece glue another so the folds are together then do the same to another so forming a little book, with one piece of cardstock then 2 stuck then another 2 then a single piece. When you open it up it will be an X.
 
Now you are going to glue the stopper in place, now I glued the stopper onto the 2 double pieces of cardstock making sure the folds at on the ground after adhering. I glued the stopper into the inside of the cradle.

 The 2 top pieces (4x6 panels) you want to fold them so one is a valley fold and the other mountain. 
Using a ruler place your closed cradle at the 0 on your ruler, you should have the opening on your right. You need to add glue to your little strip with the mountain fold. Slip the piece with glue up in between the  pieces of cardstock making sure the cardstock you are adding is flush with 6 " See the photo below. This ensure the card will fit in a 6x6 envelope.
You will notice the piece you just added is half way down and not flush against any edge or fold. See below

 Flip the cradle over, still making sure the cradle is on the 0 and do the exact same thing with the other piece of 4x6 card stock.

This is what you should have...
All you have to do now is close up the top by adding a thin line of glue between the score line and edge of cardstock. Basically where my fingers are holding it closed.
 
Any anyone wants me to do a video leave me a comment below.
 
Now you just have to add your papers and embellish. You will find the measurements above.
 
The beautiful thing about Paper Rose papers is the matching Embossed Die Cuts. This pack only has circles but I have cut out some of the Poinsetias from the circles.
 
Product List Below 
 
 
That is all from me today. Thank you for your time. 
Take Care Natalie

Wednesday, July 2, 2025

Paper Rose Studios Wedding Joy 6x6 Paper Collection | Fun Fold

Hi All, 

Today card is using products from Paper Rose Studios

 #1 


Both cards are Aus A6 which is 10.5 x 14.9cm (4 1/8 x 5 7/8)

 Product List Below

 
Tent Fold Measurements
 
I found working with inches with fun folds are much easier for the Aussie Peeps as scoring boards are measured in inches but I have included both cm and inches here.
 
Base Card
10.5cm (4 1/8") x 29.8 (11 3/4)
Score with the 29.8 along the top at 14.9cm (5 7/8) 
 
Stand
10.5cm (4 1/8) x 12.1cm (4 3/4)
Score with the 12.1 along the top side at 1.5cm (5/8), 3.8cm (1 1/2), 6.1cm (2 3/8), 8.3cm (3 1/4) and 10.6cm (4 1/8)
 
Flap
3.8cm (1 1/2) x 6.5cm (2 8/16)
Score with the 1 1/2 at top at 1.9cm (3/4)
 
Pattern Paper 10 x 14.4cm. Cut 2 of these using your desired paper.
 
#2


Feature Panel Size 7.8 x 12.1cm (3 1/16 x 4 1/14) 
Matt 8.3 x 12.6 cm (3 1/4 x 5) 
 
You can watch the video here. 
 
 
That is all from me today. Thank you for your time. 
Take Care Natalie

Saturday, January 4, 2025

Paper Rose Candy Treats Paper Collection | Fun Fold Hidden Flap
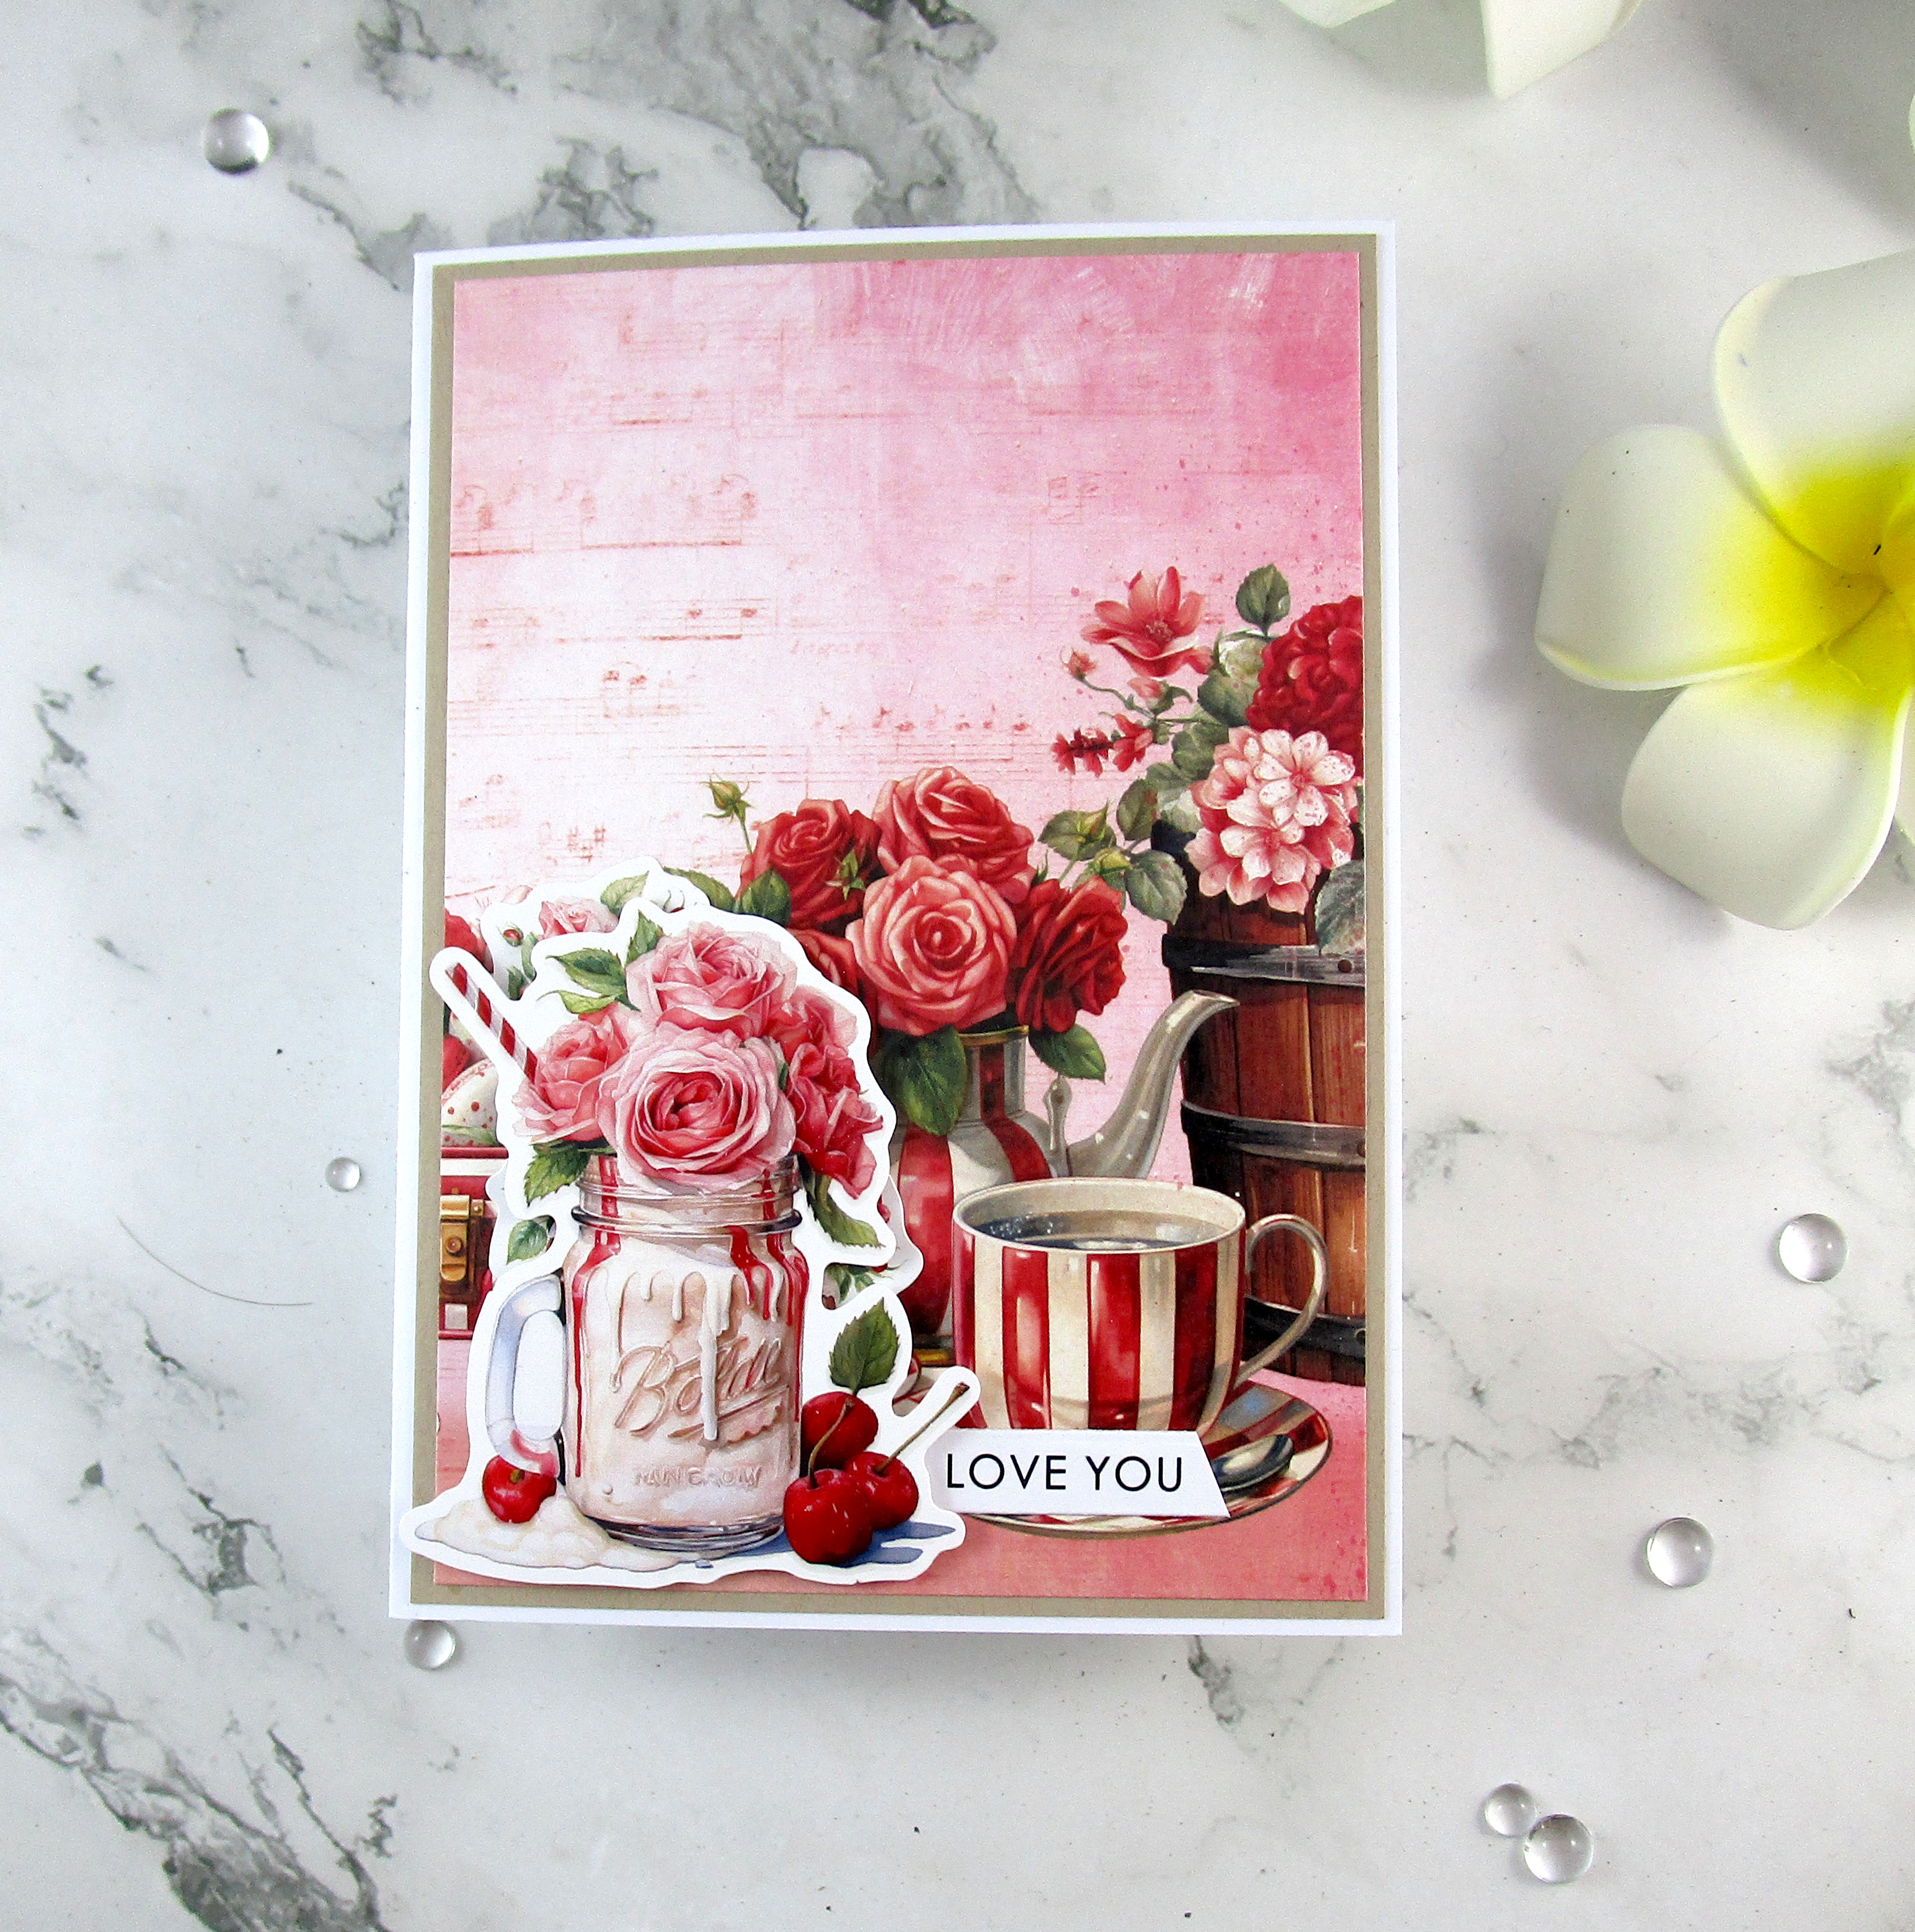
Hi All, 

Today card is using products from Paper Rose 


Card Size Aus A6 which is 10.5 x 14.9cm (4 1/8 x 5 7/8) 
Feature Panel Size 9.7 x 14.1cm 3 9/16 x 5 5/16) 
Matt 10 x 14.4cm (3 7/8 x 5 9/16) 
 

Base Card is 25.4 x 14.6cm
Score along the 25.4 side at 4 1/8 and 8 1/4 inches

Flap - 18.4 x 14.6cm
Score along the 18.4cm side at 2 7/8, 3 3/8, 3 7/8 and 6 3/4
 
Pattern Paper
Front and Inside panels - 13.8 x 9.5cm (3)
Matt panels - 14.3 x 10cm (3)
 
Flap panels - 10.5 x 6.5cm (3)
Matt - 11 x 7 cm(3)
 
Long Side panel- 14.3 x 3.8
Matt - 14.3 x 4.3cm 

Inside Writing Panel - 9.7 x 5.9cm

Product List Below 


You can watch the video here. 
 

That is all from me today. Thank you for your time. 
Take Care Natalie